
Looking for a really fun way to create a unique bath sheet for yourself or a friend? With a tie-dyed Waffle Weave Bath sheet, you'll be the envy of all the other picnickers, festival attendees or beach-goers!
We made this at the Nebraska Chapter A TTT Tie-Dye Party. The National TTT Society is a nonprofit that helps send girls to camp. At this party, our TTT Campers dyed t-shirts, told us all about camp and generally had a great time. Read more about the National TTT Society.
Gilden Tree Waffle Weave Bath sheets are 100% Cotton, so they're a snap to tie-dye. We made one in blue, purple and magenta, but why not use your favorite team's colors or match a bedroom?
You can use a White Classic Waffle Weave Bath Sheet or a White Modern Waffle Bath Sheet.
Supplies Needed:
Waffle Weave Bath Sheet
Large bucket
Rubber Gloves
Soda Ash
Rubber Bands
Newspaper
Plastic Bags
Squirt Bottles
Fiber Reactive Dyes
Instructions:
Step 1: Preparing the bath sheet.
Although you normally always pre-wash items to be tie-dyed, I didn't wash my bath sheet. Waffle weave shrinks to form little honeycombs after washing and drying, which are thicker and harder to tie.
Wearing rubber gloves, add soda ash to water in the bucket, following the directions on the box. Immerse the whole bath sheet in the soda ash solution for at least 20 minutes.
Remove the bath sheet, wringing out as much solution as possible.
Step 2: Tying the bath sheet
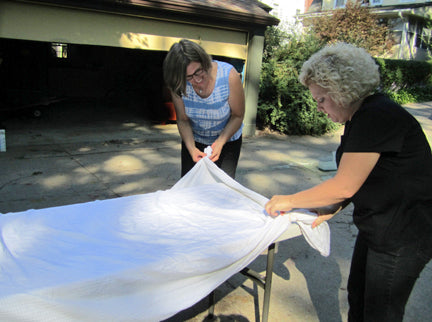
Lay the bath sheet flat, (we left the blanket folded in half) and start grabbing little pinches of cloth and securing them with rubber bands.
You can also do some "doughnut" pinches, where you rubber band the pinch and then push the tip back through. Kathy and I started in the corners.
Here's Nancy getting the last few pinches in. (We just kept pinching until we could pinch no more!) Then put your bath sheet on a plastic bag or pad of newspapers for dying.

Step 3: Dying!
Nancy helped Maya pick out the colors.

Then Maya, Luke and Rashaya used the squeeze bottles to apply dye all over.

Choose your colors and saturate as much as possible. Don't worry - you'll still have plenty of white left. (I thought we'd totally soaked it, and was surprised how much white was left.)
Step 4: Once you're done squirting the dye on it, put the whole thing in a plastic bag, seal it and let it sit for 24 hours.
Step 5: Untying, Rinsing, Washing and The Big Reveal!

After 24 hours, my son Ali helped me remove the rubber bands. This is the fun part - as you start to see the design unfold.

Step 6: Rinse the bath sheet well - with a hose if you're outdoors or in a large sink indoors. Then wash it on a gentle cycle with your regular detergent, and dry it in the dryer.
Voila! An amazing one-of-a-kind bath sheet!
Thanks to all my TTT friends - Nancy, Vanna, Tanya and Kathy for helping, and to Lisa, Jen S, Jen M, Jamie, and Tammy for help with tie-dying and the picnic!
Thanks also to the kids, Maya (my daughter) and friends Luke and Rashaya for doing the actual dying.
Finally, thanks to my son Ali for helping with the untying and rinsing.